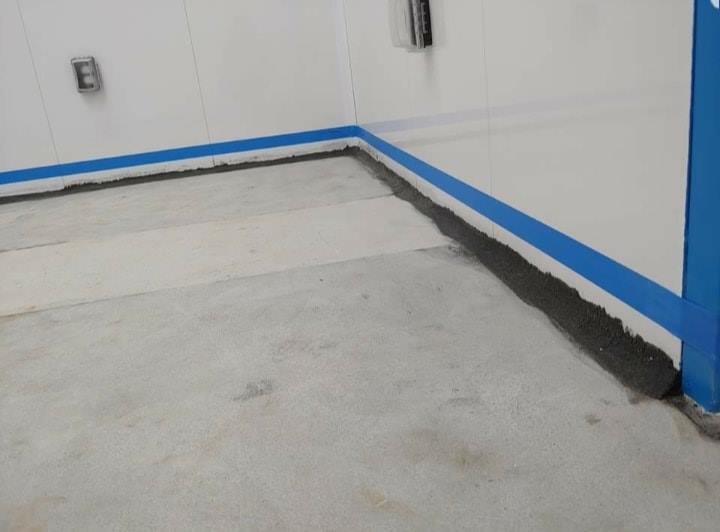
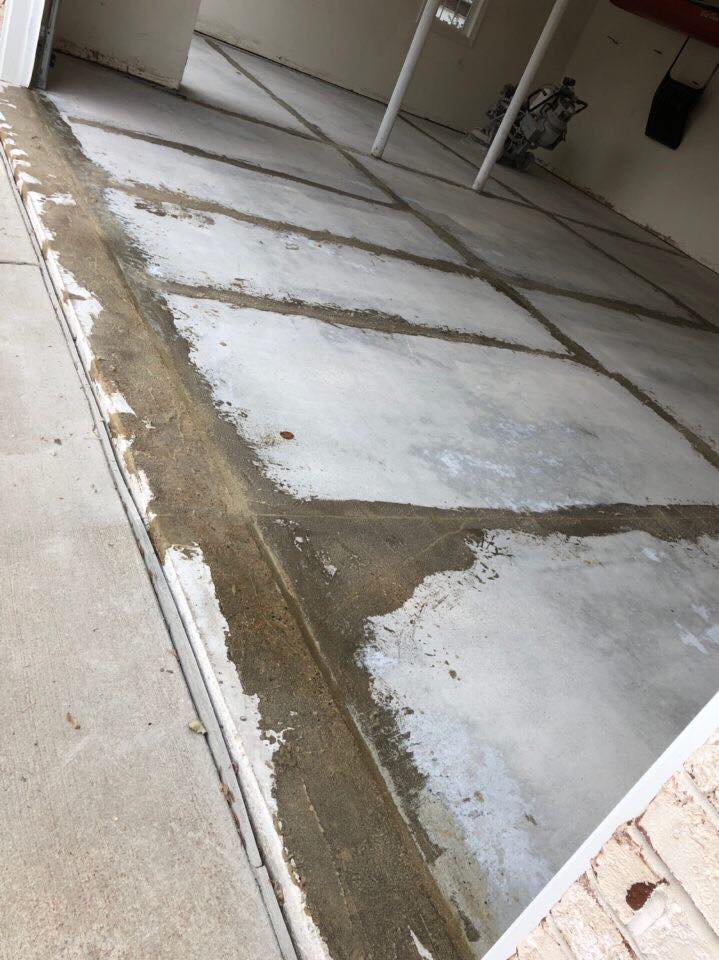
1 Day Coatings was recently contacted by a Commercial Facility that needed their floors remodeled. We were happy to meet with this client and see what we could do for them. As you can see from the image (below), this client started out with basic concrete floors and desired to upgrade to our protective Penntek Floor Coatings system.
This facility required a flooring system that could withstand heavy foot traffic and resistance to abrasions. Our 1 Day Coatings system is easily able to stand up to the challenge and provide the necessary protection that our client desired.
For those who may be new to our blog, 1 Day Coatings provides a 15-year Residential Warranty and 5-year Commercial Warranty on all flooring installations. We provide such a valuable service to our clients because we know that our floors are tough and provide exceptional value to all of our customers!
Overview of Our Installation: Prepping the Concrete
Our teams always follow the same procedure when installing our 1 Day Coatings system. For starters, we buff the floor using our floor commercial grinder to remove the top layer of concrete. Typically this top layer is aged & pitted with dust; therefore it is unable to adhere to any flooring applications. We grind this top layer of concrete to create a “fresh” layer of concrete for our product to adhere to.
Secondly, we vacuum the floors to suck up and remove any lose debris or dust. Additionally, we round the corners between our floors and walls – so our installation has a smooth finish. This is also a good technique for keeping moisture out of joints between the walls and floors.
Lastly, for this job, we used painters tape to create our frame work for the application of our Vinyl Chip System.
For additional details and a more in-depth look at our application technique, check out this article: Domino Color Installation in a Large Garage. We like to provide in-depth material and provide insight into our application techniques.
We do all of this so you can see that we are truly experts who know how to prep, install and care for your Residential & Commercial floors!
Our Installation Techniques
Our Ability to Customize Colors
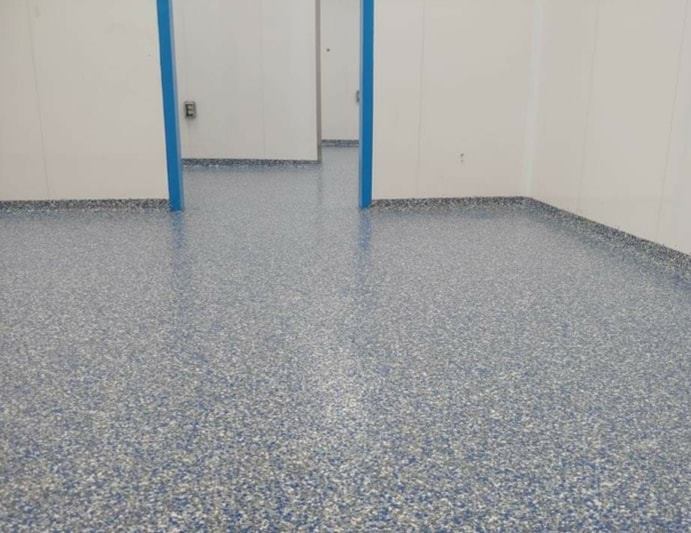
One great benefit of 1 Day Coatings is our ability to customize your Color Options! Because our product is based on a Vinyl Chip Flake system, we can select any color of chip flakes to create a look that is perfect for your home or office.
This is an amazing feature that our clients love and often use. If there is a local high school team, collegiate sport or even business colors that you want to show off – no problem. We can create the perfect blend of colors for your home or office setting to show off your unending pride!
The Benefits of 1 Day Coatings: Commercial Settings
We touched on a few of these points above, but we want to provide a quick recap of the benefits of 1 Day Coatings. For starters, Residential floors are often the treading ground of family, children and pets. Protecting your residential floors can often be tough but our teams utilize our product to keep your floors looking brilliant for years to come!
Commercial settings are just as rigorous and often place increased demand on your floors that you might not think about. For starters, offices and commercial spaces often have heavy equipment or machinery that gets moved and easily scuffs wood floors. Secondly, these commercial settings have heavy foot traffic that often results in some type of spill or abrasive abuse. Wouldn’t you like to have a floor system that is tough against all of this abuse and looks great for years to come?
Regardless of whether your floors are Residential or Commercial, our 1 Day Coatings product provides amazing benefits including:
Four times stronger than Epoxy floors
Will NOT Chip or Peel
True 1 Day Installation Time Frame
Easy to Keep Clean
100% Antimicrobial & 100% Antibacterial
Customizable Colors
Get a Free Estimate Today!
If you like what you see here and would like some additional information or possible a general estimate, please feel free to contact us! Our team would like to meet you and is excited to provide you with the next step to protecting your Home or Office Floors!
In addition, if you have any questions or would like information about our customizable color options (like this job) just let us know. We are happy to help you customize your floors to provide the perfect space for your home or office environment!
Beautiful Chestnut Color Installed in Large Garage
1 Day Coatings is hard at work again! We recently completed the installation of our Vinyl Chip System on a stunning multi-port garage in Fort Worth TX. This garage was quite large and required some patchwork prior to installing our Polyurea Basecoat.
We love to discuss our work so our clients can gain a stronger understanding of what we do everyday. Therefore, this article (along with the other articles on our Blog) are meant to shed some insight and includes details such as: installation, color selection, prep work, warranty and much more!
As always, if you have any questions over our product line, we invite you to give us a call or fill out our Free Instant Estimator form! This is a great way to get up-to-date information on our colors, pricing and availability to for beautiful floor installation!
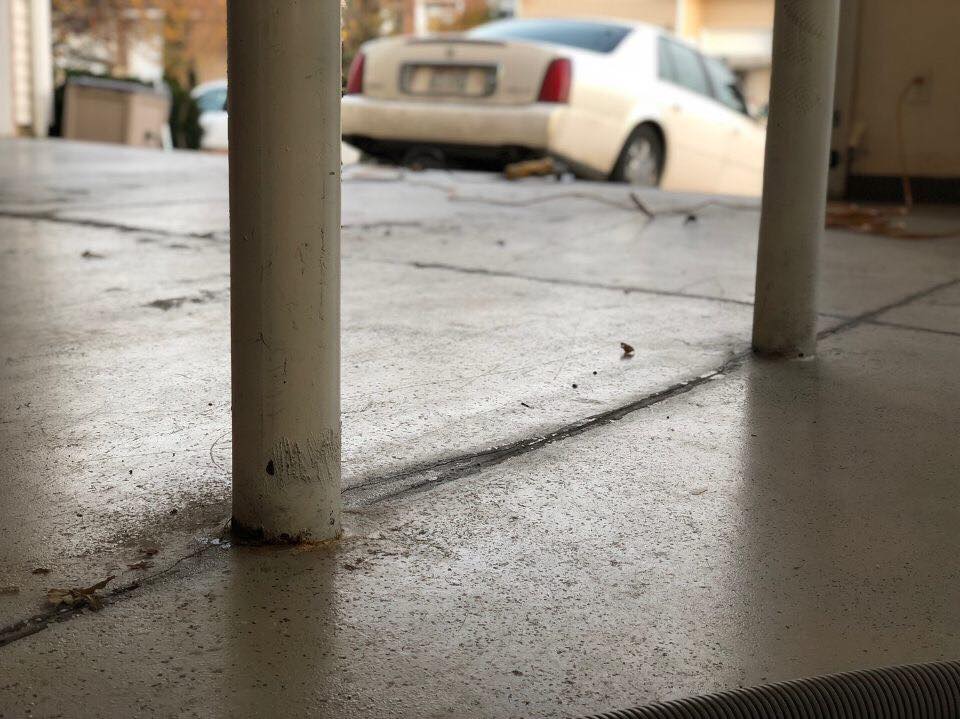
Repairing, Patching & Cleaning the Old Concrete
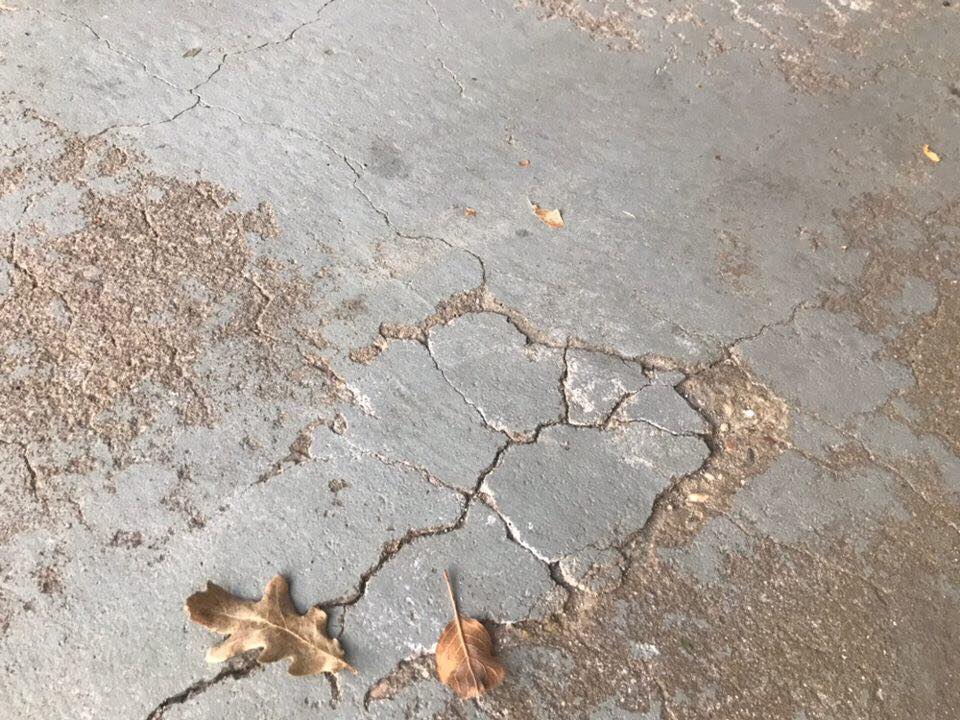
Alas, let’s get started on our discussion of this gorgeous multi-port garage in Fort Worth TX! As we previously stated, this was a very large area that required some patchwork prior to the cleaning/prepping stage for our 1 Day Coatings installation. As you can see from the image above, this floor had some uneven spots, minor cracking and rough edges.
In order to make our floors “workable” and ready to adhere to our Polyurea Basecoat, we have to smooth out the concrete surface, clean and grind it down. The purpose of all of this effort is to create a fresh & exposed layer of concrete that has a higher adhesion rate for our Polyurea Basecoat to essentially “glue” itself to. Everything is paramount on our ability to create this adhesion which is why we always spend so much time talking about this step.
There are many floor coating companies out there that do not perform this type of “prep” work during their installations. Therefore, we advise all of our customers to think twice about their purchase of another flooring system other than 1 Day Coatings. We spend the necessary time to ensure that our Industrial Floor Coating Systems are installed properly. Our industry approved method ensures that we can supply a 15-year product warranty for our residential customers!
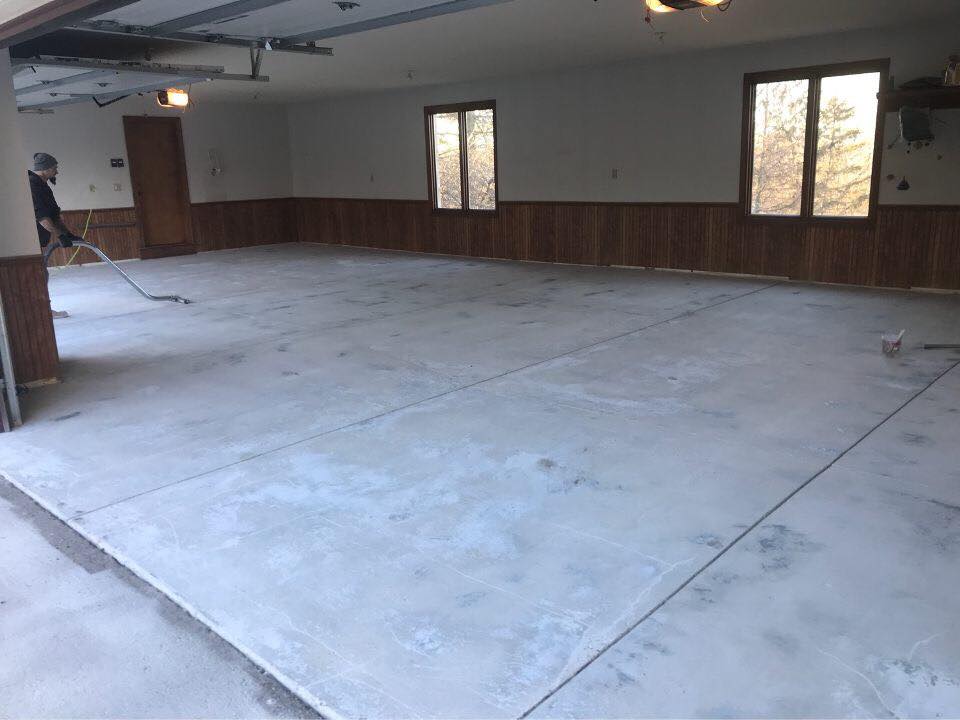
Vacuuming & Exposing Our Concrete Floor
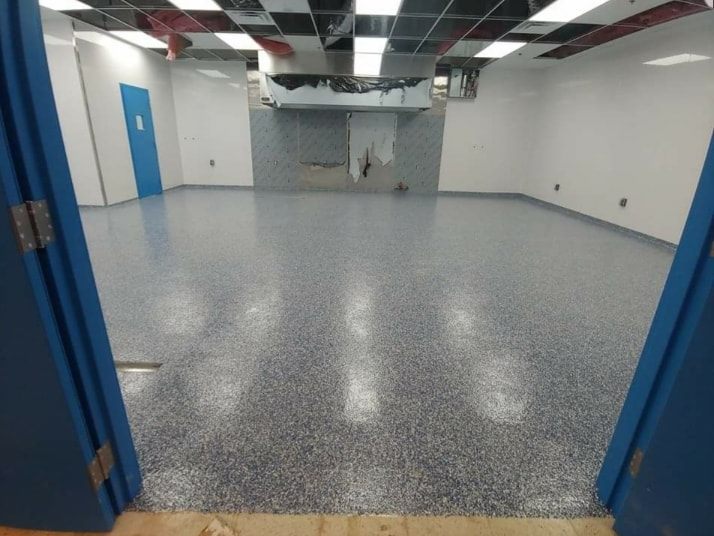
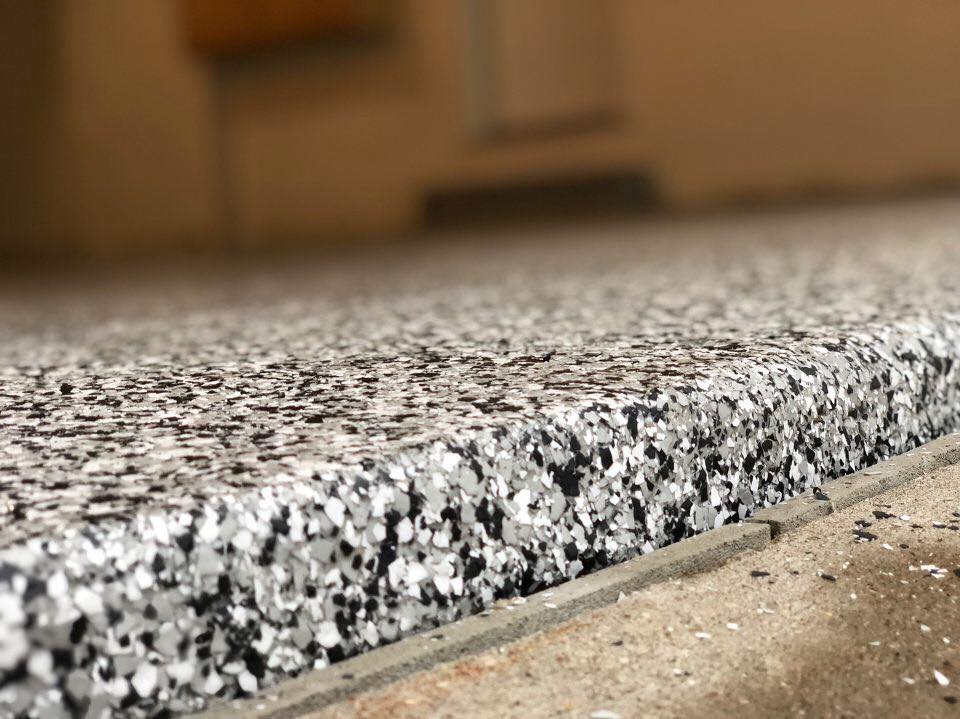
After we’ve smoothed out our surface and patched our concrete we are ready for grinding & vacuuming our floors. Comparing our first image to the second, it’s a complete night and day difference! We are very diligent about repairing the old concrete, whether it be a fresh concrete patch or utilizing our CR Mender.
Lastly, we vacuum our floors to remove all dust or any debris that might prevent the adhesion of our Polyurea Basecoat layer. In essence, we want a “sterile” environment to install our flooring system.
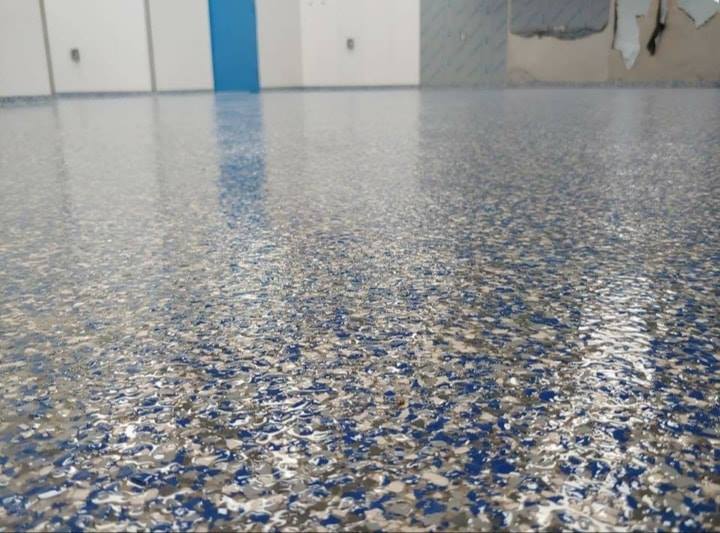
Our Stunning Final Results
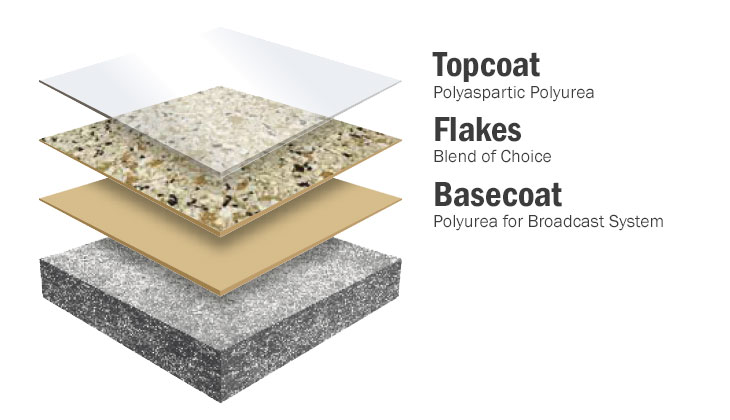
Alas, things move pretty quickly once we’ve prepped our work space. From here we follow these simple steps to install our 1 Day Coatings system!
Polyurea Basecoat
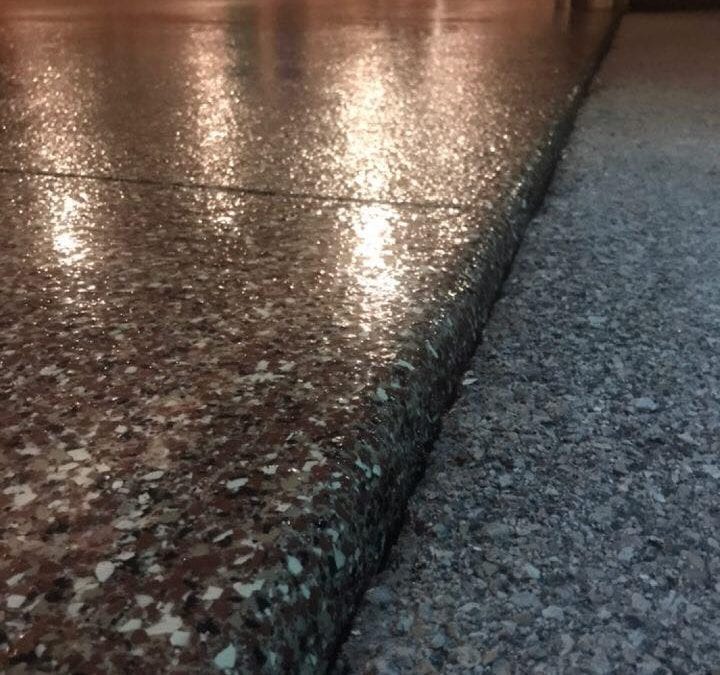
Vinyl Chip Flakes (this is the color option that you choose)
Polyaspartic Polyurea Topcoat (Creates the “Orange Peel” like texture)
If you’re looking for a protective floor coating system that can keep you home, office or industrial environment safe – you’ve found the perfect product! Our product is so tough and residential that it can protect your floors from oil, spills, stains, water, abrasions, impacts and much more. We can install our industrial flooring system on nearly any surface including:
Garage Floors
Outdoor Patios, Sidewalks & Pool Decks
Warehouses
Commercial Kitchens
Manufacturing Facilities
Much more…
Get a Free Estimate Today
As you can tell, we proudly advertise what all our Penntek Floor Coating systems are able to do & withstand. Our product has been taking the Dallas Fort Worth Metroplex by storm every since our initial product offering a few years ago.
We have many stellar reviews from our clients (Facebook link) and will gladly answer any questions that you have over our product and how it fits your home, office or work environment!
Therefore, we invite you to give us a call, send us an email or fill out our Instant Estimator form if you’d like some more information! We’d love to meet you and add you to our growing 1 Day Coatings family!
1 Day Coatings has completed another renovation project; this time in a large multi-port garage with old epoxy flooring. Our crews were assigned the task of:
As usual, this project took us only one day to complete and you can see the difference our amazing Vinyl Chip Flake system has made on their residential garage flooring!
Our Premier Industrial Floor Coating: Abilities & Overview of Installation
If you’re new to 1 Day Coatings, this is a great time to inform you of all that we are able to repair, renovate and install with our commercial grade flooring system.
Our premier industrial flooring system consists of a proprietary polyurea floor compound that can adhere to any surface to give it a smooth “orange peel like” texture. Our system is backed by a 15-year residential warranty and a 5-year commercial warranty. In addition, our product can stand up tough against: oil spills, abrasions, sudden impacts, water and much more
If you took a moment to read our aforementioned article (link above) then you noticed we place a lot of emphasis on “grinding down the floors to create a smooth concrete surface.” This is a paramount part of our installation process and it has multiple purposes.
For instance, on this particular job we needed to remove the original & failing epoxy floor system. Using our floor grinder, we removed the epoxy flooring to expose the concrete surface below. This fresh exposure of new concrete gives us a clean surface for our Polyurea Basecoat to adhere to. Our Polyurea Basecoat acts as our “glue” holding our Vinyl Chip System to your concrete floor and is the key ingredient that makes our surface so tough for the long run.
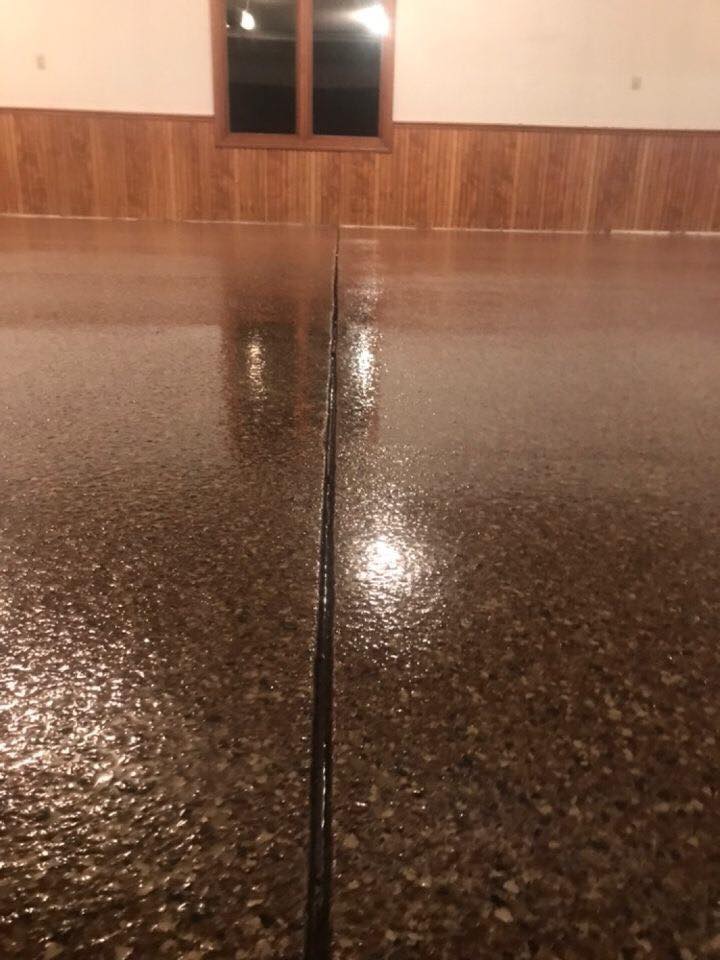
Filled in The Cracks & Joint Lines
In addition to exposing the concrete surface, we also take the time to fill in our cracks with our CR Mender (crack repair) system. This mender creates a smooth surface by filling in our surface cracks so that our 1 Day Coatings product can sit smoothly on the surface.
Secondly, and with permission from our clients, we can fill in your joint lines (many garages have them) to create our smooth finish. Some home owners prefer to keep these joint lines and that’s okay. We just offer this as an added benefit to our clients if they so choose.
Smoothing Out The Edges
Lastly, our team can grind out, fill in or chisel rough concrete patches that may exist along your concrete surface. We repair these rough areas to create the smooth flooring system that we are so famous for. Therefore, if you have some rough patches in your garage, warehouse, kitchen or any other area – please let us know so we can identify how best to repair these areas. This is an important step in our installation process and you’ll be glad that we took the time necessary to address these issues of concern.
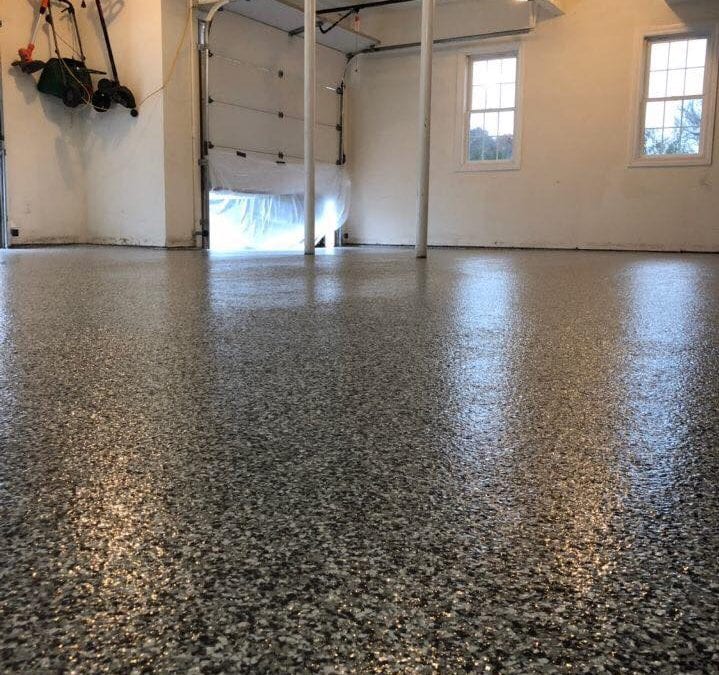
Installed The Domino Color
Don’t you just love when you finished product comes out beautifully and flawless? So we do! In fact, this project is a perfect example of just how beautiful our Domino Color looks inside of a multi-port garage.
Our client is elated with their new flooring system and all of the added benefits that it will provide them for years to come! Now this multi-port garage can now operate as an effective work space. From parking their cars, to working with tools, painting or playing with kids – this 1 Day Coatings floor is now ready for all that life has to throw at it!
After all, shouldn’t we all have safe, fun and protected areas for our families to grow, learn and play together! We think so to and its our mission to bring our beautiful 1 Day Coatings product to all who desire a safer, well protected area of their home: inside or out!